Picky Kitchen
Gas stove burners face daily spills, grease, and crumbs. A yellow flame or uneven heat can signal that a burner needs attention, though other problems may be involved. Knowing how to clean gas stove burners safely helps you remove buildup without damaging delicate parts or creating avoidable risks. Small details matter.
Before cleaning, switch off the controls and let every burner cool completely. Check the appliance manual, since burner caps and grates differ by model. Use gentle tools, such as a soft brush and a damp cloth, rather than sharp objects that could block or scratch burner openings. Keep water away from igniters and electrical connections. Never reassemble parts while they are wet. Dry them fully.
A careful routine can improve cleanliness and help burners work as intended, but cleaning is not a fix for every flame problem. If a burner remains uneven, smells of gas, or fails to light after proper cleaning, stop using it and seek qualified service. Don’t guess. It can be tempting to scrub harder when a stain persists, but more force is not always better. This guide focuses on practical precautions, common mistakes, and simple cleaning steps, while recognizing that appliance designs vary. Check the manufacturer’s instructions whenever a general tip conflicts with your stove’s guidance.
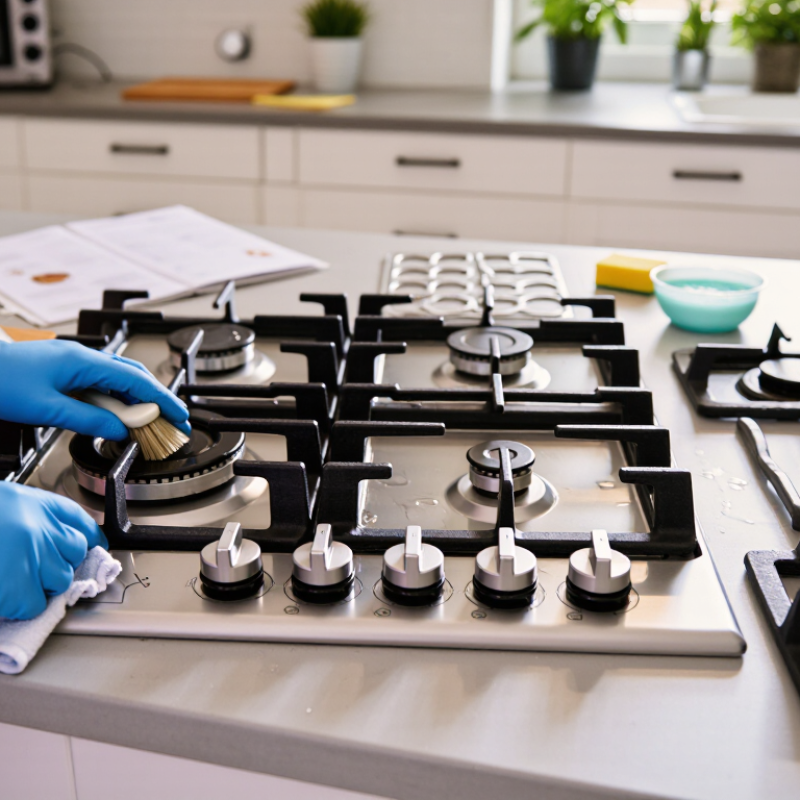
Safe gas-burner cleaning matters because grease, food debris, and moisture can interfere with burner ports and ignition. A burner that lights unevenly may leave cold spots under a pan or produce an unusual flame.
The National Fire Protection Association’s 2020 Home Cooking Fires report found that cooking equipment was involved in 49% of reported U.S. home fires from 2014 to 2018. That figure does not mean dirty burners caused those fires, but it shows why careful cooking-area maintenance deserves attention.
Turn the burner off and let it cool fully before cleaning. Remove only parts your appliance instructions identify as removable. Use a soft brush or cloth; avoid pushing wire into gas openings, which can damage or enlarge them. Keep water away from ignition components, and let all parts dry before reassembly.
Small details matter. If a burner still struggles to light, shows a persistent yellow flame, or smells of gas, stop using it and contact a qualified technician. I might once have treated a quick wipe as enough; now I would check the ports and let the parts dry longer. That extra pause is sensible, not fussy.
Before cleaning, turn every burner knob to OFF and let the stove cool completely. Let it cool completely. A warm grate can look harmless but still burn your fingers. Open a window or switch on the range hood, then clear the counter around the stove. Move dish towels, paper, cooking oil, and other items away from the work area. Keep children and pets out while you prepare.
Set out a bowl of warm water, mild dish soap, a soft brush, and clean cloths. Wear household gloves if you prefer, and keep a dry towel nearby for parts that need thorough drying. Check your stove’s instructions before lifting burner caps or grates; designs differ, and some parts need careful alignment later. Avoid pouring water near igniters or electrical components. No shortcuts here.
If you smell gas, do not continue or operate switches; leave the area and contact your gas provider or emergency service from a safe location.
It can feel fussy to arrange everything before scrubbing, but a clear, dry workspace makes handling small parts less awkward. I still find it easy to overlook a damp cloth near the controls, so move it well away.
Turn every control knob off and let the cooktop cool completely. Let everything cool. Check the appliance manual before removing parts, because burner designs differ. On many cooktops, grates, caps, and burner heads lift off separately. Keep each set together; swapping parts can affect how they sit and ignite. Never pull on an ignition electrode or disconnect the gas line for routine cleaning.
Wash removable metal parts with warm water and mild dish soap. Use a soft brush to loosen grease around the burner ports. No scraping. Avoid metal picks, which can damage or widen openings, and keep water away from electrical igniters. Rinse carefully, then dry every part fully with a cloth and extra air-drying time. It is easy to rush this step; damp components may cause uneven ignition.
Reinstall each component in its original position, seating caps level and aligning burner heads as the manual shows. NFPA’s 2024 Home Cooking Fires report estimates that cooking equipment was involved in 49% of reported U.S. home fires from 2017 to 2021. Cleaning is not a substitute for safe cooking, but clear, correctly seated components support steady operation. If a burner clicks continuously, flames look irregular, or you smell gas, stop using it and contact a qualified technician.
Drying deserves more attention than it gets. After rinsing the burner parts, shake off excess water and wipe each piece with a clean, lint-free cloth. Check the small flame openings for trapped moisture or food. Let the parts air-dry completely on a dry towel, including underneath and around the openings. Patience matters. A damp burner can ignite unevenly or fail to light. Avoid using a flame, oven, or high heat to speed things up; rushing this step is tempting, but it is not worth the risk.
Before reassembly, make sure the cooktop is cool and all burner parts are fully dry. Put each burner head back in its original position, then set its cap on top so it sits flat and does not wobble. Keep the ignition electrode clear and dry. A crooked cap can cause delayed or uneven ignition. Check that the grates are stable, too. If your stove’s manual shows a specific arrangement, follow it; burner designs differ. Turn one burner on briefly and watch it light. If ignition seems abnormal or you smell gas, turn the controls off, ventilate the area, and contact a qualified technician.
Before cleaning, make sure every burner is off and completely cool. If your cooktop uses electric ignition, disconnect power when the manual recommends it. Lift off removable grates and caps gently; forcing stuck parts can bend them. Wash them with warm, soapy water, then rinse and dry them fully. A damp cap may cause uneven ignition. Small detail, big difference.
Check each burner for crumbs or grease around its openings. Clear loose debris with a soft brush, and follow the appliance manual for stubborn residue. Avoid enlarging the openings with pins or scraping them with sharp tools. I might be tempted to scrub harder, but that can damage parts. Wipe the cooktop with a soft cloth, keeping water away from ignition components.
Once everything is dry, seat each cap flat and centered. Turn on one burner at a time and watch the flame from a safe distance. A steady blue flame is generally expected, though brief changes can occur as a burner lights. Notice persistent yellow flames, delayed ignition, or repeated clicking? Turn the burner off and consult the manual or a qualified technician. If you smell gas, don’t test the burner; leave the area and contact your gas provider or emergency services. Cleaning helps, but it cannot fix every burner problem.
After cleaning, check that burner parts are correctly seated, ports are clear, ignition works, and the flame is steady and mostly blue.
Illustrative example only: 1 means the check passed; 0 means it needs attention. Turn the burner off and let it cool before cleaning, and follow your stove’s manual. If the flame remains abnormal or you smell gas, stop using the stove and seek qualified help.
Grease, crumbs, and moisture can block burner openings. This may cause uneven flames or ignition problems.
Turn the burner off and let it cool completely. Small details matter.
Remove only parts that your appliance instructions identify as removable. Burner designs differ.
Use a soft brush or cloth. Do not push wire into the openings; it could damage them.
Shake off excess water, then wipe each piece with a clean, lint-free cloth. Let everything air-dry fully on a dry towel. Patience matters.
Return each burner head to its original position. Set the cap flat, check that it does not wobble, and keep the ignition electrode dry.
Make sure the grates are stable and all parts are dry. I used to rush drying; that was not my best habit.
Stop if it still struggles to light or has a persistent yellow flame. If you smell gas, turn the controls off, ventilate the area, and contact a qualified technician.
Knowing how to clean gas stove burners safely helps keep your kitchen cleaner while reducing the risk of damage or uneven flames. Begin by turning off the stove and allowing it to cool completely. Clear the work area, then remove the burner grates, caps, and other removable parts according to the stove’s instructions. Use warm, soapy water and a non-abrasive brush to loosen grease and food residue. Avoid soaking or poking the burner openings, as this can affect how gas flows.
Rinse the removable components and let every part dry fully before putting the burners back together. Check that each piece sits correctly and that the burner openings are clear. When the stove is reassembled, briefly test the burners and look for steady, even flames. Regular gentle cleaning and prompt attention to spills can help maintain burner performance and make future cleaning easier.